6.22.2008

Backsplash

We are knocking of little projects here and there (and by we I mean Aaron, I can't take credit for much lately).

We had long planned on installing 1x1 glass tiles for our kitchen backsplash. A lot of people have assured us that tiling is easy but it just seems so intimidating. (Electrical work, framing, installing insulation and blue board, painting, or refinishing floors, no problem. Plumbing and tile work, just not in our comfort zone - yet.)

This intimidation has led us to hem and haw for well over a year. But it has all turned out wonderfully. We toyed with the idea of installing some sort of metal sheeting for the backsplash and finally took the plunge. Aaron worked on this project over Memorial Day weekend.


I love it! A lot. It is a bit intense in the space but it is cool, and fairly unique and, well - cool. Oh and did I mention in comes in 2'x4' panels and was $2.57 a square foot. (Aaron is almost embarrassed at how cheap they were but not me - because I did mention that they are cool didn't I?)


I thought I'd pass along our source that had such good prices. www.architecturaldepot.com

Also, a note about the pictures: I didn't bother to put the stuff (i.e. junk) all back into its normally very organized locations before taking the pictures so please, don't judge me.

11.19.2007

Bedroom

Well -

I got distracted and never posted the before and after of the bedroom. Another distinct possibility is that I've never had the bedroom clean enough to photograph it.

Anyway -

Here are side by side before and afters...

Photo Sharing and Video Hosting at Photobucket Photo Sharing and Video Hosting at Photobucket

Photo Sharing and Video Hosting at Photobucket Photo Sharing and Video Hosting at Photobucket Photo Sharing and Video Hosting at Photobucket

As I post these things I sometimes think that the transformation of the space doesn't really show well. That is definitely the fault of my photography skills as well as the fact that we have too much stuff for our small place. So let me assure you, it was a lot of effort (on going of course), and a big change. When we moved in it would have been described as dinky and bland. Now it is vibrant and at least has the feeling of spaciousness, if not that actual state of being.

7.07.2007

Study

We call it the study...we like to give big names to small rooms. Because we took the dividing wall down it is now wholy visible from the kitchen and vise versa.


We started with...

Photo Sharing and Video Hosting at Photobucket


And the result

Photo Sharing and Video Hosting at Photobucket


What we did...


  • Photo Sharing and Video Hosting at Photobucket Photo Sharing and Video Hosting at Photobucket
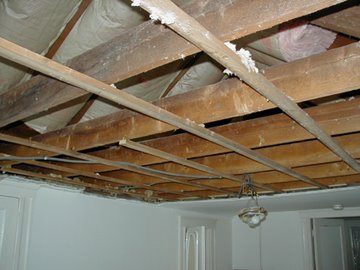
    Removed old ceiling (pictures show the change in one day), raised to underside of roof rafters. We had to double up the support beams for the dormer, that is the reason that the ceiling has such a funky profile. (Summer 2005)
  • Removal of wall seperating kitchen and study. (Summer 2005)
  • Added recessed lighting. (Summer 2005)
  • Installed blueboard and hired a plaster. (Fall 2005)
  • Added, repaired and scraped window trim (January 2007)
  • Installed beadboard. (Spring 2006)
  • Photo Sharing and Video Hosting at Photobucket
    Removal of carpet and scrapping of old linoleum to reveal original fir. (Spring '07)
  • Painted...then repainted. (Spring '06 & April '07)
  • Sanding and refinishing fir. Inlaying oak to hide gap left by removal of wall and to tie the two floors together. (May 2007)

Kitchen

What we started with...

Photo Sharing and Video Hosting at Photobucket Photo Sharing and Video Hosting at Photobucket

Translation - we started with 2 feet of counterspace.

What we have now...

Photo Sharing and Video Hosting at Photobucket Photo Sharing and Video Hosting at Photobucket

What we did...

  • Photo Sharing and Video Hosting at Photobucket
    Removed old ceiling, raised to underside of roof rafters. We had to double up the support beams for the dormer, that is the reason that the ceiling has such a funky profile. (Summer 2005)
  • Removal of wall seperating kitchen and study. (Summer 2005)
  • Photo Sharing and Video Hosting at Photobucket
    Added recessed, pendant, and above cabinet lighting. (Summer 2005)
  • Installed blueboard and hired a plaster. (Fall 2005)
  • New cabinets and laminate countertop. **We recommend One - Way Lumber in Salem, MA for cabinets. (May 2006)
  • Added, repaired and scraped window trim (January 2007)
  • Removal of "Lick and Stick" tile (3 layers of that) and scrapping of old linoleum to reveal original fir. (Summer '06 & Spring '07)
  • Painted...then repainted. (Spring '06 & April '07)
  • Sanding and refinishing fir. Inlaying oak to hide gap left by removal of wall and to tie the two floors together. (May 2007)

7.06.2007

Living Room

This is what we started with...

Photo Sharing and Video Hosting at Photobucket Photo Sharing and Video Hosting at Photobucket
Looking up the stairs & as seen from the rest of the house.

This is the "final" product...

Photo Sharing and Video Hosting at Photobucket Photo Sharing and Video Hosting at Photobucket
Nearly the same views...


In this room we:

  • Photo Sharing and Video Hosting at Photobucket
    Took down existing ceiling (and accompaning hideous styrofoam beams) reframed roof to raise collar ties up two feet. (Dead of Winter 04-05)
  • Photo Sharing and Video Hosting at Photobucket
    Removed a coat closet to create more useable wall space. (Spring 2005)
  • Added more insulation to exposed wall cavities. (Spring 2005)
  • Photo Sharing and Video Hosting at Photobucket
    Installed new blueboard and hired contractor to plaster. (Nov. 05 - Jan. 06)
  • Photo Sharing and Video Hosting at Photobucket
    Installed track lighting and ceiling fan. (I know, I know...track lighting...ewwww! Well take a look...I think it is perfect!) (Summer 2005)
  • Added trim above windows, stripped paint, and made window sill deeper. (Spring 2006)
  • Took up chopped up flooring, put down new underlayment, installed new prefinished oak. (Fall 2004 & Summer 2006)
  • Removed "stub" wall above stairs to enable furniture movement, the plan is to reinstall a removable banister. (Summer 2005)
  • Painted. (Spring 2006)

Guess What!!

The remodel is (pretty much) done.


Stay tuned for the before and afters.


Lets finally end this!

1.19.2007

Disapperance

So...Its been quite some time since I last posted. Man, I've just been SLAMMED at work and, you know, getting the house done and the holidays and all. Well - not that I've GOTTEN the house done...not that I've even really worked on the house...um...um...LISTEN - I've got a life outside of remodeling okay...so get off my back!! And YES we ARE getting so close to finishing...well like I said, I'm not. But the sweet Hubbie is really making progress. In fact he is at good ol (i.e. the home of the devil) Home Depot stocking up on stuff so he can get a early start in the morning. We are SOOOO close!

8.26.2006

We have a two year old!


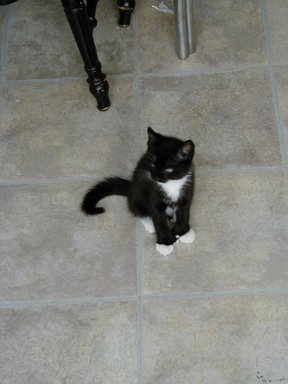
This week was a big week for us. Quincy was born August 24, 2004 and we closed on our condo August 25, 2004. We got Quincy six weeks later when my boss brought him in "just for me to look at" and of course he came home with me.

We quickly because "those people" who treat their cat like it is their child (except we do leave him alone for a week when we travel places...but we worry about him the whole time). Quincy makes us feel like we are a family instead of simply a couple.


Happy
Birthday
Quincy!!
...oh he's gotten so big!


8.22.2006

Lets Start in the Bedroom

Thats always a good place to start something *wink

Going....


Going....


Gone!

Just a note that cleaning up this crud was a nightmare!!...

And this is after the roof rafters had been reframed. Which, at the request of our fellow condo owners, we hired a liscensed and insured contractor to do...much to the chagrin of our budget and Hubby's pride.

6.07.2006

And down comes the ceiling!!

So here we are December 2005. Sweet Hubs and I are not good kids cause we choose to stay at (our) home for Christmas and demolish our house instead of going to our (parents) homes for Christmas. It should be known that we ARE relatively self-centered.

We had to wait a few days to get our building permit...which is a really cool badge of courage that 50% of the people in our town have posted in there windows. While waiting we started another project...repainting the common stairway that we share with the second floor neighbor...and which we still haven't actually 100% finished. But that is pretty boring and pathetic and I know that you've been waiting patiently for ACTUAL information and pictures of the much (way to much) talked about demolition.

Grr.... the pictures won't post...

5.28.2006

The Verdict

No problem!! Pretty standard roof structure. Nothing super surprising. We had a engineer that hubby works with check over our proposed new structure and so it should stand up. (1.5 years later I still get nervous during a big windstorm and when we go out of town I'm certain we will come home to find our house laying in a heap on the ground. But we religiously check the corners of the walls and there are no cracks yet!)

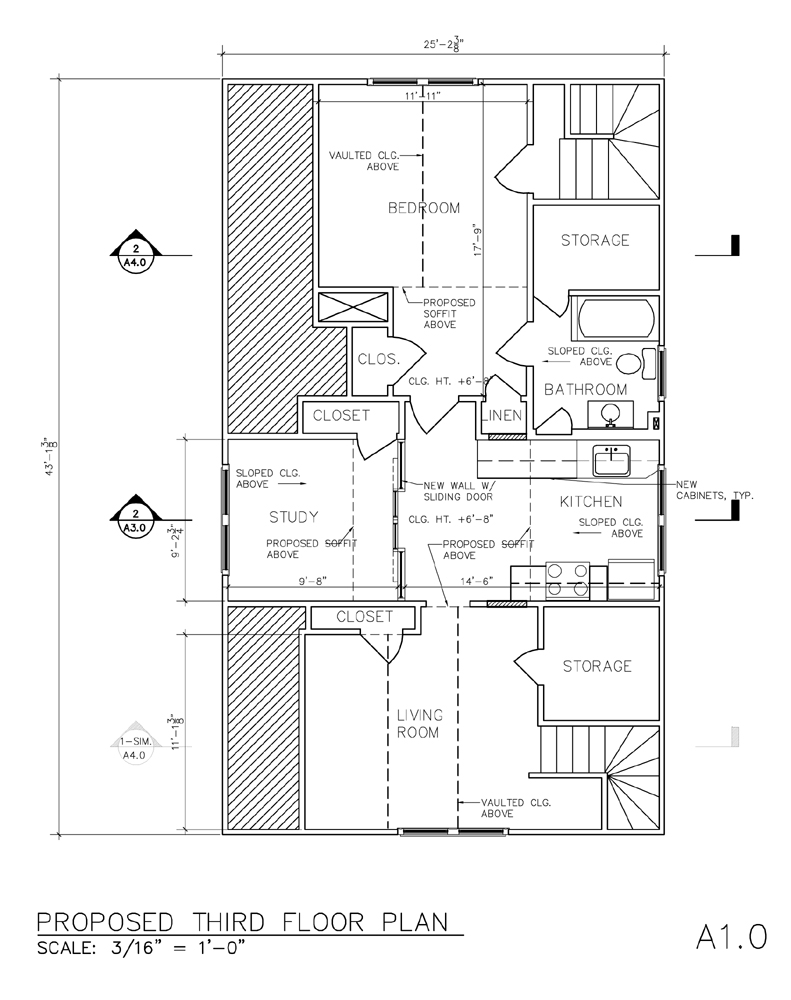
We have varied a little bit from the proposed plans. You'll see pictures later on of the walk-in closet we added, we moved the refridgerator, we took the smaller closet out of the living room, and we haven't added the sliding wall yet.


Hopefully the section gives you an idea of what we did in the living room and bedroom. The section through the kitchen and study is a bit more complicated and I'll post pictures later on.

(Now obviously you are all thinking...hum...thats not what I imagined at all!! It is pretty simple...and even if it is tiny, it fits us perfectly!)

5.24.2006

And with the swing of a hammer they're off!!

The second we saw this place we were ache-ing to see what the roof structure looked like. Perhaps we could have come up with a way to investigate this before moving in cause if we hadn't been able to alter it we would have been stuck with 6'-8" ceilings (the height of a standard door). But we took our chances and very soon after moving in hubby took a crow bar and hammer to the ceiling and climbed on up.

Carpet Wrestling

Okay - I know that most of you don't care but I want this to be THE ultimate source on our remodel. So here is one more thing about carpet and linoleum. (Trust me, it seems like I'm much more obsessed with flooring than I really am.)

One day, mid-December (2004), We went and helped some friends who were doing a pretty intense remodel. They were just doing finishing touches, including refinishing their floors. So of course we thought...Oh we can do that! (oooh, that attitude gets us in so much trouble.) So we went home and took up the carpet in the bedroom. Instead of a pad we found older carpet underneath (probably a big factor in allergies my hubby had been suffering) and under that, of course, linoleum. It had come up so easily in the living room that we got started immediately on the stuff in the bedroom. We actually thought we would be sanding the floors that weekend!!

So now, a year and a half later, we have about a fifth of the lino scrapped up in the bedroom and have decided to take up all the old wood and put in new wood. Live and learn!

Anyway - here is a picture of Mr. Tough Guy wrestling with the carpet.


And me in my oh so cute breathing mask and my sexy grey sweats. (Go Vandals!)

4.22.2006

In the beginning

Okay - I'm just going to quickly start from the beginning.

My darling husband and I are the type who say:

"Lets think about looking for a house next year" Then start looking that month

-or -

"Lets look for a long time, we don't want to settle on something to soon" Then look at five places and choose the 2nd one we saw.

The thing about our place is the location. It is on the third floor of a three family house, just outside of the historic district (as if everything weren't historic) and a 10 minute walk from downtown and hubby's work. I told him "If this is even semi-livable I want it."

Fateful words.

It WAS semi-livable when we bought it.

Here's a picture of the outside...


So we bought the condo on August 25th, 2004 (which was one day after our soon be be cat was born...awwww...). We didn't do much on it for a few months. Hum...I don't remember why, perhaps it was because it was SOOO darn hot!! (For those of you from the west, the humidity is a killer!) We had a friend come visit us the end of September, we hadn't done anything on our house by that point (expect put paint swatches on the wall and stare at them). After she left I tore up the carpet in the Living room.


We were pretty disappointed to see that sometime in the past 80 years someone had plunge cut into the floor, probably to do wiring on the second floor. That, combined with the huge gash in the floor where a wall used to be made it pretty impossible to reuse the existing floor. The linoneum that was under the carpet came up really easy in that room, ironicaly. In later rooms (the bedroom in particular) where the floor was in good condition the lino is stuck tight.

4.19.2006

View from the Bedroom


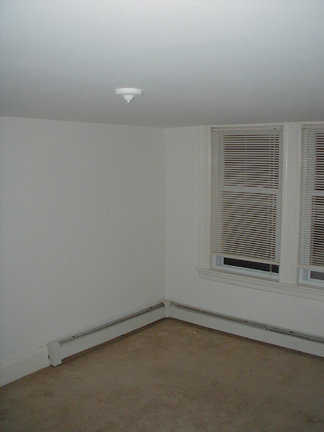
This is the Bedroom looking toward the Study/Kitchen. The door open to the left is the Bathroom, the closed door to the right is the Closet.

Here is our kitchen. I think the fact that I've cooked ANYTHING in the past year and a half is pretty commendable. Oh and yes...those ARE pull strings on the lights. Like I said, we saw potential.
This is the Study. We like to give important names to fairly mediocre spaces. I'm only showing this cause there is a pretty drastic change in the after pictures. But for now you'll have to wonder.

4.18.2006

B.R. (Before Remodel)


I never emailed pictures of our new condo to friends and family. I was embarrassed. As architects we should have found an exciting and compelling place to rest our feet at the end of a long day. Instead we found the most mundane, dull, drab place on the market and called it our own. We could see the potential, and I guess I must apologize to you all for assuming that you wouldn't be able to see it and would instead feel sorry for us. I should have known that was inevitable.

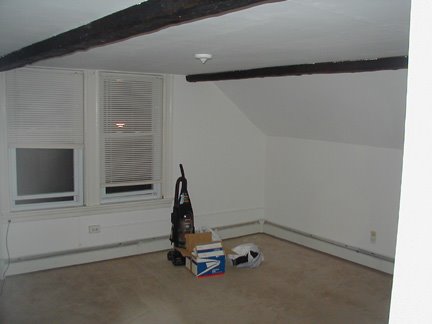
So finally, here are the before pictures. Looking at them now they seem so clean and organized ... sigh. Then first picture is looking from the door way of the study into the living room. It was the faux (styrofoam) beams the really sold us on the place.

4.13.2006

Day 443 of our captivity...

Wouldn't it be cool if you could follow us through the whole process of our remodel, day by day? Well you can't. I didn't think of this until last month so this is unfortunately a remodel retrospective. Well - fortunately for us because we are nearly finished. I'd say 2-3 months....Wait a minute. We were saying that a year ago. So I guess that although I wish I would have thought of this at the beginning of the project there is no reason to think I won't get good use of it.

This will be pretty much a posting of before and afters with a few comments about what we are doing now sprinkled in. The "what we're doing now" parts will probably give you an idea of why this has taken so long. Oddly enough we have other things to do beside remodel!

Okay - hold on a minute while I learn how to post images...

Uh oh...It didn't work...okay...I have lost interest for the moment. I'll edit this later and then we'll REALLY get this started.