6.22.2008

Backsplash

We are knocking of little projects here and there (and by we I mean Aaron, I can't take credit for much lately).

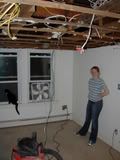
We had long planned on installing 1x1 glass tiles for our kitchen backsplash. A lot of people have assured us that tiling is easy but it just seems so intimidating. (Electrical work, framing, installing insulation and blue board, painting, or refinishing floors, no problem. Plumbing and tile work, just not in our comfort zone - yet.)

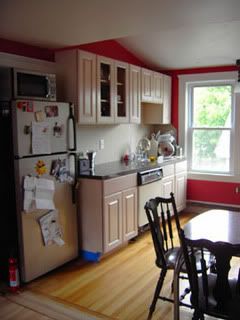
This intimidation has led us to hem and haw for well over a year. But it has all turned out wonderfully. We toyed with the idea of installing some sort of metal sheeting for the backsplash and finally took the plunge. Aaron worked on this project over Memorial Day weekend.


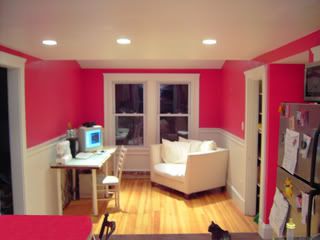
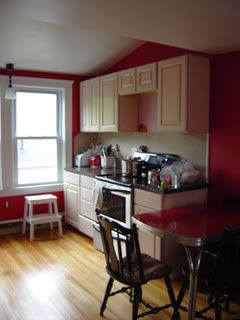
I love it! A lot. It is a bit intense in the space but it is cool, and fairly unique and, well - cool. Oh and did I mention in comes in 2'x4' panels and was $2.57 a square foot. (Aaron is almost embarrassed at how cheap they were but not me - because I did mention that they are cool didn't I?)


I thought I'd pass along our source that had such good prices. www.architecturaldepot.com

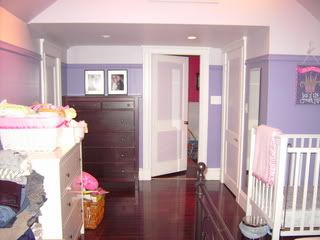
Also, a note about the pictures: I didn't bother to put the stuff (i.e. junk) all back into its normally very organized locations before taking the pictures so please, don't judge me.

11.19.2007

Bedroom

Well -

I got distracted and never posted the before and after of the bedroom. Another distinct possibility is that I've never had the bedroom clean enough to photograph it.

Anyway -

Here are side by side before and afters...

Photo Sharing and Video Hosting at Photobucket Photo Sharing and Video Hosting at Photobucket

Photo Sharing and Video Hosting at Photobucket Photo Sharing and Video Hosting at Photobucket Photo Sharing and Video Hosting at Photobucket

As I post these things I sometimes think that the transformation of the space doesn't really show well. That is definitely the fault of my photography skills as well as the fact that we have too much stuff for our small place. So let me assure you, it was a lot of effort (on going of course), and a big change. When we moved in it would have been described as dinky and bland. Now it is vibrant and at least has the feeling of spaciousness, if not that actual state of being.

7.07.2007

Study

We call it the study...we like to give big names to small rooms. Because we took the dividing wall down it is now wholy visible from the kitchen and vise versa.


We started with...

Photo Sharing and Video Hosting at Photobucket


And the result

Photo Sharing and Video Hosting at Photobucket


What we did...


  • Photo Sharing and Video Hosting at Photobucket Photo Sharing and Video Hosting at Photobucket
    Removed old ceiling (pictures show the change in one day), raised to underside of roof rafters. We had to double up the support beams for the dormer, that is the reason that the ceiling has such a funky profile. (Summer 2005)
  • Removal of wall seperating kitchen and study. (Summer 2005)
  • Added recessed lighting. (Summer 2005)
  • Installed blueboard and hired a plaster. (Fall 2005)
  • Added, repaired and scraped window trim (January 2007)
  • Installed beadboard. (Spring 2006)
  • Photo Sharing and Video Hosting at Photobucket
    Removal of carpet and scrapping of old linoleum to reveal original fir. (Spring '07)
  • Painted...then repainted. (Spring '06 & April '07)
  • Sanding and refinishing fir. Inlaying oak to hide gap left by removal of wall and to tie the two floors together. (May 2007)

Kitchen

What we started with...

Photo Sharing and Video Hosting at Photobucket Photo Sharing and Video Hosting at Photobucket

Translation - we started with 2 feet of counterspace.

What we have now...

Photo Sharing and Video Hosting at Photobucket Photo Sharing and Video Hosting at Photobucket

What we did...

  • Photo Sharing and Video Hosting at Photobucket
    Removed old ceiling, raised to underside of roof rafters. We had to double up the support beams for the dormer, that is the reason that the ceiling has such a funky profile. (Summer 2005)
  • Removal of wall seperating kitchen and study. (Summer 2005)
  • Photo Sharing and Video Hosting at Photobucket
    Added recessed, pendant, and above cabinet lighting. (Summer 2005)
  • Installed blueboard and hired a plaster. (Fall 2005)
  • New cabinets and laminate countertop. **We recommend One - Way Lumber in Salem, MA for cabinets. (May 2006)
  • Added, repaired and scraped window trim (January 2007)
  • Removal of "Lick and Stick" tile (3 layers of that) and scrapping of old linoleum to reveal original fir. (Summer '06 & Spring '07)
  • Painted...then repainted. (Spring '06 & April '07)
  • Sanding and refinishing fir. Inlaying oak to hide gap left by removal of wall and to tie the two floors together. (May 2007)

7.06.2007

Living Room

This is what we started with...

Photo Sharing and Video Hosting at Photobucket Photo Sharing and Video Hosting at Photobucket
Looking up the stairs & as seen from the rest of the house.

This is the "final" product...

Photo Sharing and Video Hosting at Photobucket Photo Sharing and Video Hosting at Photobucket
Nearly the same views...


In this room we:

  • Photo Sharing and Video Hosting at Photobucket
    Took down existing ceiling (and accompaning hideous styrofoam beams) reframed roof to raise collar ties up two feet. (Dead of Winter 04-05)
  • Photo Sharing and Video Hosting at Photobucket
    Removed a coat closet to create more useable wall space. (Spring 2005)
  • Added more insulation to exposed wall cavities. (Spring 2005)
  • Photo Sharing and Video Hosting at Photobucket
    Installed new blueboard and hired contractor to plaster. (Nov. 05 - Jan. 06)
  • Photo Sharing and Video Hosting at Photobucket
    Installed track lighting and ceiling fan. (I know, I know...track lighting...ewwww! Well take a look...I think it is perfect!) (Summer 2005)
  • Added trim above windows, stripped paint, and made window sill deeper. (Spring 2006)
  • Took up chopped up flooring, put down new underlayment, installed new prefinished oak. (Fall 2004 & Summer 2006)
  • Removed "stub" wall above stairs to enable furniture movement, the plan is to reinstall a removable banister. (Summer 2005)
  • Painted. (Spring 2006)

Guess What!!

The remodel is (pretty much) done.


Stay tuned for the before and afters.


Lets finally end this!

1.19.2007

Disapperance

So...Its been quite some time since I last posted. Man, I've just been SLAMMED at work and, you know, getting the house done and the holidays and all. Well - not that I've GOTTEN the house done...not that I've even really worked on the house...um...um...LISTEN - I've got a life outside of remodeling okay...so get off my back!! And YES we ARE getting so close to finishing...well like I said, I'm not. But the sweet Hubbie is really making progress. In fact he is at good ol (i.e. the home of the devil) Home Depot stocking up on stuff so he can get a early start in the morning. We are SOOOO close!